So, you want to write a Windows Driver? (Part 1)
So, you’d like to write a Windows kernel mode driver? No? Well, run along then.
Curious though? Then read on.
I’ve always loved system programming – for some reason the interface to hardware is just so much more exciting and appealing than pure software API interfaces. You have a complex machine at your disposal, which can only be directed by an arcane sequence of carefully executed reads and writes to its control bits. Of course some hardware can be really exciting and fun to use (e.g. Nintendo Gameboy Advance was an excellent platform), and other interfaces can be pretty grueling and boring (My least favorite so far is the I2C hardware on the NXP LPC1342), but it’s always a great feeling to write a bunch of commands and have the hardware smoothly execute the complex maneuver you have prepared. Most of my experience in system programming has been on embedded platforms, microcontrollers, game consoles. The hardware in modern PCs is actually surprisingly similar, though because of the architecture differences, devices use DMA more often for efficient access.
It’s actually really simple to get going with a new driver on Windows – not that the system is simple, Windows drivers are very complex – they can run on multiple versions of the Windows kernel and are required to participate in some level of the system’s power management system, so there’s a lot of arcane details at play – However, there are various driver frameworks which handle all of these details for you, allowing you to focus on just the functionality you care about.
In this multi-part series I’m going to walk through the process of building a new driver (using WDF/KMDF), getting it to load on hardware (a PCI Express device), and receiving usermode requests and programming the hardware to do something. Eventually I’ll repeat this with some other frameworks (I have NDIS and Storport in mind)
This isn’t hard, but it is obscure and a bit arcane so it’s not a path that I believe is visible to new driver developers. The documentation is pretty thorough but the massive breadth of detail in Windows kernel driver development can be daunting for a newcomer.
Note also that I don’t intend to showcase all the pitfalls of driver development here, but I’ll mention some of them as they’re relevant.
One final side detail is that I’m currently employed by Microsoft. To be clear, though, this series is the product of my own time using publicly available information which I’ll try to link extensively. I’m fortunate to have had a lot of opportunities to learn these details in my work and I’m eager to make it easier for others to get started. There’s a daunting amount of information available, often written with the assumption that you’re familiar with the space (which you soon will be, given a few early steps into driver development)
So, without further delay, this is Part 1: Building and loading a driver.
1) Build a sample driver
To get started building drivers, you should obtain and install Visual Studio 2015 (the Community Edition is free), and the Windows 10 Driver Kit (which will also install the Debugging Tools). The process for earlier versions of windows varies a bit, as the Visual Studio integration was first included in the Windows 8.0 Driver Kit, before that the WDK is a separate and standalone entitiy that works a bit differently. I’m not going to cover the details of the older system.
With those installed, in Visual Studio you can create a new project. The steps below are for Visual Studio 2015 with the Windows 10 Driver Kit installed, as linked above.
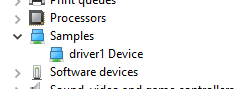
Create a new KMDF Kernel Mode driver (in the Templates \ Visual C++ \ Windows Driver node), I’m calling mine “driver1″. This will produce quite a lot of things in the project, but it’s really a very simple project – The source code is spread out across a few files but it’s relatively descriptive and provides good information about many of the operations it’s doing.
Let’s briefly walk over the pieces of this driver and what it’s doing.
First, in Driver.c there’s a DriverEntry function. This function is what is called when the driver is first loaded, and where you inform the operating system of the driver’s callback functions. Your driver is loaded in the system before the system asks you to add and take control of a device.. So this function is really just about registering your driver with the operating system. When you’re doing this, all of that is pretty much done for you in WdfDriverCreate, which is where you declare your driver’s callbacks for adding a device, and a callback for unloading to clean up state, and anything else you need to hook. The DriverEntry in this sample code also initializes WPP Tracing, which is a lightweight way to get realtime logging from your driver, which consumes basically no CPU time when it’s not enabled and very little when it is enabled, as it doesn’t do any string processing in the driver (just saves raw strings and parameters to the log) – I’ll talk more about this later.
So, when the kernel wants to add a device to the system that your driver will be in charge of, it will (among other things) call your DeviceAdd function that was registered with KMDF. The template’s device add callback just logs information and calls into a CreateDevice function in Device.c. The heart of this function is a few calls into KMDF which then does the heavy work of setting things up for you. WdfDeviceCreate is the core call that sets up the device the system is asking you to create, and when that succeeds the CreateDevice function continues to initialize the context (which is per-device memory that you can use to store state related to that instance of the device), it registers a device interface (which is one of the easier ways to be located by usermode processes so they can talk to the driver), finally calling into a QueueInitialize function in Queue.c which creates an IO Queue with WdfIoQueueCreate to receive DeviceIoControl requests from usermode processes or other drivers.
Beyond the driver code, there is also a basic default INF file in the Driver Files folder in the project.
INF files are another pretty complex topic that I’ll do my best to explain in a future installment. In short, an INF file describes to Windows that a certain driver should be used to manage devices with specific hardware identifiers (the hardware identifiers exposed by the underlying bus drivers). This is basically what “Plug and play” is – devices have identifiers to distinguish them, and the OS has a database to know which driver to load in order to communicate with a specific device. INF files also contain instructions for installing the driver (copying the necessary files, adding registry keys, various other things) when the system detects a device of that type.
The basic INF that’s pregenerated starts off configured to load on a Root\ hardware ID, which is (by convention) a location for loading software drivers that aren’t really related to hardware. We’ll use this location for early testing.
[Standard.NT$ARCH$]

%driver1.DeviceDesc%=driver1_Device, Root\driver1
At this point you should be able to build the driver in Visual Studio. I have changed the “x86″ default platform in the toolbar (or build / configuration manager) to “x64″ to build a 64bit driver for my 64bit test machine, and when I rebuild all, under the folder x64/debug in my project the build has generated a bunch of files. The SYS file is the driver and the PDB is debugging information that the debugger will need for accurate debugging of the driver. The INF is also here, and a CER file which contains the public certificate for the key used to test-sign the driver.
In a subfolder is a signed copy of the INF and driver – These files are catalog signed, and if you inspect the properties of the CAT file you will see that it has cryptographic hashes of the .inf and .sys files, and the CAT file itself has been signed with the private key corresponding to the certificate in the CER file. If you install this CER file into the trusted root store of the target system, it will install the INF without any complaints – but this configuration should only be used for testing. Also if you have a kernel debugger attached, the system will allow you to install a signed driver even if it does not trust the signature (for testing purposes)
2) Prepare a test machine
I strongly recommend using a second physical system for hardware driver development. Remember, you’re loading custom code into the kernel – and so most software errors will actually take down the system and require a reboot, rather than just gracefully terminating your application. I have a really minimal system cobbled together from some cheap and reused parts for this – it doesn’t have to be expensive, though a small SSD is a good investment to get you up and running again quickly if you do crash and burn (even being really cautious it’s likely you’ll eventually take the system down, and much more likely when you’re less familiar with kernel development)
If you’re not interested in developing for hardware but just want to get into making software devices or filter drivers, a VM is also a good option, though note the details below on setting up network kernel debugging may not work on VM platforms.
3) Setup Kernel Debugging
A kernel debugger is really useful to have when working on drivers – it will catch fatal errors and give you an interactive way to examine the system that might help you quickly understand why the error occurred, decreasing the cost of a mistake. You can also set breakpoints to help you better understand the flow of execution in the system or examine the system on a specific event.
There are several ways to configure kernel debugging – Serial, 1394, USB (requires a special cable), and most recently, Network debugging.
Net debugging is the most recent and one of the easiest forms of kernel debugging to use, so I’ll use it here.
Briefly, net debugging is where the Windows kernel debugger takes over the network card in order to allow it to be used by the kernel debugger when everything else in the system is frozen by the debugger. So, it only works on certain network cards – mainly Intel and Broadcom cards at the moment. If your system doesn’t have one of these cards, compatible add-in cards are inexpensive (I keep this card as a backup spare NIC, and it works well as a debugger NIC).
However some systems may not be able to use net debugging because it’s not possible to add a compatible card (laptops and VMs that don’t have compatible cards) – You can try the other debugging transports for those systems.
Note also that since net debugging takes over the network card, it does mean the network connection will have lower performance compared to running with the correct driver, so if network performance is a concern it’s best to do enable kernel debugging using a separate card, or not at all (enabling the kernel debugger also carries a performance penalty in general)
First, we will configure network debugging on the test machine (debugging target), and then we will need to set up a debugger on another machine (the debugger host) to connect to it.
To prepare, find the IP address of the debugger host which is going to debug the target.
On the test machine, open an elevated (Administrator) command prompt and issue these commands:
C:\Windows\system32>bcdedit /dbgsettings net hostip:192.168.1.15 Port:50000

Key=21ju5nwhsrzk1.1fi9b1oibws8o.1szi0pp2s6t13.3vmskfn5kdvao
C:\Windows\system32>bcdedit /debug on
The operation completed successfully.
The above two steps are the minimal configuration to enable net kernel debugging. Make a note of the “key” value, as this must be entered into the debugger on the debugger host in order to successfully connect.
Sometimes further configuration is necessary or useful:
C:\Windows\system32>bcdedit /set {default} testsigning on

The operation completed successfully.
C:\Windows\system32>bcdedit /set {default} busparams 3.0.0
The operation completed successfully.
C:\Windows\system32>bcdedit /dbgsettings net hostip:192.168.1.15 Port:50000 key:a.b.c.d
Key=a.b.c.d
First, enabling test signing allows the system to load untrusted drivers. This makes it easy to develop your drivers without having to manage your own signing infrastructure or generating and installing certificates.
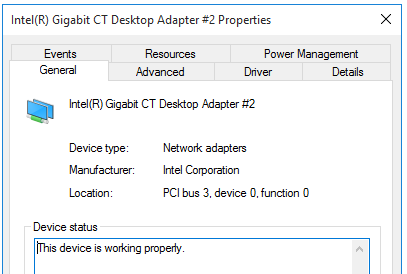
If you have multiple network devices in the system, you may need to set busparams to tell the kernel debugger which NIC to attempt to use. The string you give it is a PCI bus.device.function tuple, you can discover the device location from the properties in device manager.
Be aware that this bus location may change if you add or remove PCIe cards in the test system, it depends on how the bios enumerates them.
Additionally you can specify your own key that’s easier to remember. The key is used for encryption on the transport, so if you are on a larger network using the automatically generated random key is a good idea to prevent other people from being able to decode the data or take over the communication channel.
These bcdedit settings require a reboot to take effect, and on the next boot the specified network card will obtain a DHCP IP address and attempt to connect to a waiting debugger at the IP address you specified. It may delay boot for a short time waiting to connect if no debugger responds.
On the debugger host, you need to have the Debugging Tools for Windows installed – This will be included if you have previously installed the Windows SDK or if you have installed the Windows 10 Driver development kit as in the first step.
One of the tools included in the debugging tools is called “windbg” – Find and run the 64bit windbg from the start menu or its location on disk. Usually a path like C:\Program Files (x86)\Windows Kits\10\Debuggers\x64
In windbg, in the File menu choose “Kernel Debug”. Enter the Port and key from earlier, and if things work correctly, you will see a connection message in the kernel debugger.
Waiting to reconnect...

Connected to target 192.168.1.36 on port 50000 on local IP 192.168.1.15.
This means the debugger is connected and can break in (to examine the system), and will be notified if there are any (enabled) error events on the target. Many types of events can be trapped, so the default set only breaks on conditions like crashes.
The debugger will also display additional informational messages when the target machine is rebooting and on some other events.
4) Deploy this driver on the test machine
So, now, with a working test system and kernel debugger – Copy the built driver over to the target system (the INF, CAT and SYS), and also copy devcon.exe - this tool is found in the WDK tools under C:\Program Files (x86)\Windows Kits\10\Tools\x64
I normally open a file share on the test system so I can copy files to it easily and write some scripts to update things. Saving time on iteration pays off in the long run.
To install the driver for the first time, we can use this devcon command (running as administrator) to create a new device node for it with the Root\device1 hardware ID:
devcon install driver1.inf Root\device1
If your driver signature was not trusted, the device install process will pop up a scary-looking red dialog asking if you want to install it anyway – If you want to automate this process though, you should install the certificate as mentioned earlier which will avoid any popups.
And that’s it! The driver is installed and running!
As part of the installation Windows has copied the driver to c:\windows\system32\drivers\ – The easiest way to update the driver is to disable the device from devcon or device manager, then replace the .sys file there with a newly built version, and re-enable the device.
Thanks for reading!
This has been a really brief introduction to the subject, and the next installment will continue with more details about debugging and tracing, and we’ll write a usermode application to talk to the driver.
Any questions or details you’d like to see addressed in the future? Please feel free to leave a comment and I’ll see what I can do. It’s been a while since the last blog post I’ve written, and it may be a few weeks before I have the next one ready – so thanks in advance for your patience.
RSS feed for comments on this post. | TrackBack URI